Getting Started
- Sebastian Letzel
- Former user (Deleted)
- Peter Kleimann
Introduction
This document aims to get you starting with ![]() .
. ![]() is a tool integrating executable specifications and automated functional testing into software development processes, thus reducing any ambiguity related to the expression of needs between all actors.
is a tool integrating executable specifications and automated functional testing into software development processes, thus reducing any ambiguity related to the expression of needs between all actors.
This document should be read for instance by
- Business analysts who are specifying the expected behavior of the system under development,
- Programmers who are implementing of course the system under development, and programming a thick layer of code allowing the system to be tested thanks to
 ,
, - Testers who are checking that the system under development is meeting the expected behaviors.
If you don’t know what is an executable specification please read carefully the section [What_Is_An_Executable_Specifications].
If your are familiar with the executable specification concept you can directly dive into the section [What_LivingDoc_tools_do_I_need].
Information about the ![]() tools installation is given in the section [How_to_Install_LivingDoc].
tools installation is given in the section [How_to_Install_LivingDoc].
Then you will find quick steps helping you to actually kick start with ![]() in section [How_to_Run_My_First_Executable_Specification].
in section [How_to_Run_My_First_Executable_Specification].
Finally, please take advantage of the [Glossary] in which we have explained the most frequently used terms in this document.
What is an executable specification?
Now more than ever, the need of responsiveness and high quality regarding the software product we are delivering becomes urgent. Realization time from the concept to the solution (time to market) must be drastically shorten.
One of the most challenging issues is the time we invest to check that a software product meets perfectly the expected requirements. These days, dedicated teams are spending time to manually and massively write down the expected behavior. The other side, additional teams are spending time to validate manually the realized product against the documented behavior.
The fact is that alternative and more efficient ways exist and they address both following goals : * reduce waste of time for the company, * deliver more valuable product to costumers.
How is it possible?
The traditional way is often similar to this one:
- Team of Business analysts write down detailed specifications to heavy documents. They try to anticipate all the expected behaviors (functionalities) of the system under development. This step is done up front of the realization stage of the product under development. This stage can be long, very long.
- After a relatively long stage of realization, comes the time of validation : QA people are taking test to check if the product meets the expectations described in the specification documents.
- At the end of this validation stage, it is common to find out issues (or also called defect) and at that time, it is very difficult to predict when the product will be actually finished.
The new way to deal with specifications could be that one:
- Business analysts are working close to (or into) the development team. They only work on a few behaviors (or functionalities) at the same time.
- Business analysts write specifications into and programmers implement the corresponding functionalities.
- As soon as the functionalities are done, anyone can execute the specifications and check if the system under development are meeting them
The benefits of the ES (executable specifications) approach regarding the traditional way are the following:
- the time to discover an issue in the product is highly reduced, so the corresponding cost are also saved,
- the risk of misunderstanding specifications is highly reduced since the specifications are directly executed and tested, there is no place for ambiguity,
- the risk of developing unused functionalities are highly reduced because development team is working close to the specifications (we say here requirements development driven).
What LivingDoc tools do I need?
What is Confluence?
Managing executable specifications is done thanks to a wiki that every team member should access to. This wiki must be Confluence including the ![]() plug-in (also called
plug-in (also called ![]() Toolbox). To install Confluence and the
Toolbox). To install Confluence and the ![]() plug-in, please read section [How_to_Install_LivingDoc_for_Confluence]. Use the Confluence wiki to create, edit and execute the
plug-in, please read section [How_to_Install_LivingDoc_for_Confluence]. Use the Confluence wiki to create, edit and execute the ![]() specifications.
specifications.
Work environment for Java
Writing the specifications in Confluence is not enough. To make them executable you need to implement source code called fixtures. There are different ![]() tools for use within a JAVA work environment.
tools for use within a JAVA work environment.
- As an Eclipse user you may use the Eclipse plug-in to interact efficiently the system under test (JAVA source code) and the specifications (Confluence pages)
- Analogous there is a Plugin for IntelliJ IDEA users
- To integrate the acceptance tests in your CI/CD environment you can use the appropriate plugins for gradle, maven and jenkins
How to Install LivingDoc?
How to Install LivingDoc for Confluence?
How to Install JAVA?
Installation
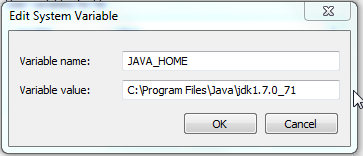
Download the latest JDK version here Post-Installation Create an environment variable JAVA_HOME that point to the location of the JDK directory of the installation (ex: JAVA_HOME=C:\Program Files\Java\jdk1.7.0_55)
How to Install Confluence?
NOTE:
This document only show common indications to help you get started quickly. The full documentation can be found here. The Confluence version use for this guide is 5.7.0.
Installation
Prerequisite
You have to install a Java Virtual Machine first. Please see section [How_to_Install_JAVA].
Preparation
- Download the latest Standalone version of Confluence here
- Request an evaluation key here (a sign-up is required!)
Extract the Confluence archive (atlassian-confluence-5.7.1.zip) to a directory (ex: C:\ ). The archive already include a directory like atlassian-confluence-5.7.1, so the result of the extraction will give us the final directory C:\atlassian-confluence-5.7.1 that will represent the confluence.home throughout this guide.
Edit the file confluence.home\confluence\WEB-INF\classes\confluence-init.properties : Uncomment the confluence.home key at the end of the file Update the value to a directory to store the Confluence data (ex: C:/atlassian-confluence-5.7.1/data). Use / instead of \ for directory separator. This directory will be created by Confluence on start if it doesn’t exist.
###########################
# Configuration Directory #
###########################
# specify your directory below (don't forget to remove the '#' in front)
confluence.home=C:/atlassian-confluence-5.7.1/data
Starting Confluence
Start Confluence by launching confluence.home\bin\startup.bat Open your internet browser to http://localhost:8090 The first time you try to access Confluence, you would need to go through a wizard that will help you configuring Confluence.
Installation Type
Please select the Standard Installation option. In case you do not have any regular license you are able install a trial version first.

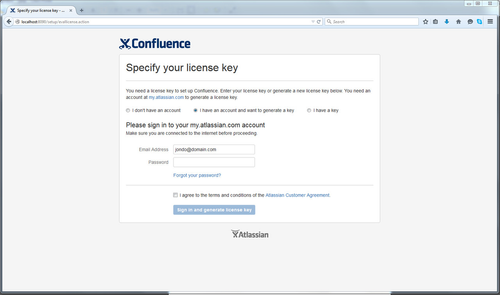
Enter License step
At this step, please enter the license key obtained earlier.
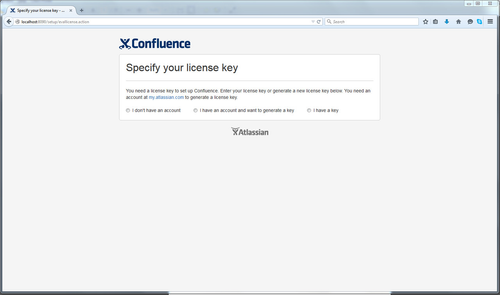
Otherwise use your Atlassian Account to generate an evaluation key automatically. The key is valid for a period of 30 days.
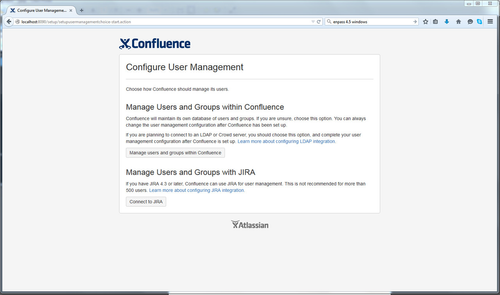
User Management
At this step, please configure your user management. In case you are already running a JIRA instance you are able to connect your instance at this point in time.
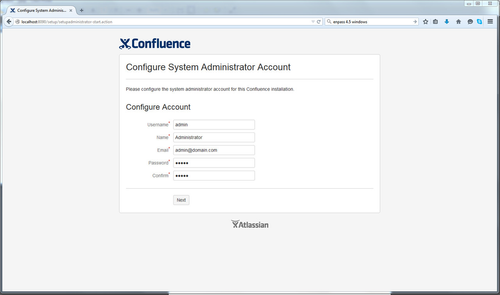
System Administrator
Please note that the username is admin and the password admin.
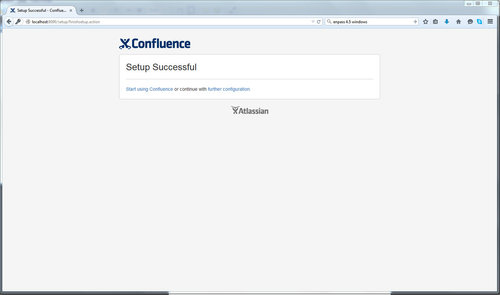
Setup Completed
Stopping Confluence
Stop Confluence by launching confluence.home\bin\shutdown.bat
How to Install Confluence Plug-in?
Prerequisites
A Running Confluence instance ( see section [How_to_Install_Confluence] ).
Preparation
- Download the latest version of Confluence Plugin here
The installation of LivingDoc is no different from any other Confluence plug-in installation. Simply upload your confluence-livingdoc-plug-in-xx-complete.jar via your Universal Plugin Manager (see Confluence | Administration | Addons menu)
Basic Configuration
- Log in Confluence using admin as username and admin as password
- Follow the Browse | Confluence Admin menu entering the Administration Console page
- Select Plugins item in the Configuration navigation menu entering the Plugin Manager page
- Select the "LivingDoc Toolbox" among the installed plugin list (shortcut)
Click the Configure plugin button
Make sure the Quick Install is selected in the Installation Type, then click Save button
Click on the Demo Space tab Enter credential that will be use for accessing Confluence from an external resource. From section [How_to_Install_Confluence] those credentials are admin as username and admin as password.
Click the Create Demo Space button
Now, to see if things are working properly, click on the View Demo Space button
Scroll to the bottom part of the ![]() demo space
demo space
Click on the Execute button and make sure all the results are green
A detailed documentation of how to install the Confluence plugin can be found here.
How to create your first executable specification?
Before creating a hello world example a registered Confluence Space is necessary. A detailed documentation of how to prepare your Confluence Space for LivingDoc can be found here. Please make sure you registered your Space, specified your system under test and set your Space Theme to LivingDoc Theme. Subsequently you can start writing your executable specification. Please follow this introduction.
How to Install Eclipse plug-in for JAVA?
CAUTION : This document only show common indications to help you get started quickly. The LivingDoc Eclipse Plugin version use for this guide is 2.2.0.3 and the Eclipse IDE is 3.4.1 (Classic bundle).
Prerequisites
- A Java Virtual Machine (please see section [How_to_Install_JAVA])
- A running Confluence instance (please see section [How_to_Install_Confluence])
Preparation
- Download the Eclipse IDE here
- Install the eclipse Plugin from the following update site.
Installation
Follow the installation instruction on this site here