Eclipse plugin
- Former user (Deleted)
- Miguel R. Santaella
- Former user (Deleted)
Eclipse is an open source community. A large and vibrant ecosystem of major technology vendors, innovative start-ups, universities, research institutions and individuals extend, complement and support the Eclipse platform.
Table of Contents
Install
The update site for LivingDoc's Eclipse development tools plugin is located at http://updatesite.novatec-gmbh.de/updatesite/testit/livingdoc/livingdoc-eclipse4:
- Current released version: 1.3.2: http://updatesite.novatec-gmbh.de/updatesite/testit/livingdoc/livingdoc-eclipse4/releases/1.3.2/
Supported Eclipse versions:
The plugin has been tested from version 4.3 to 4.5
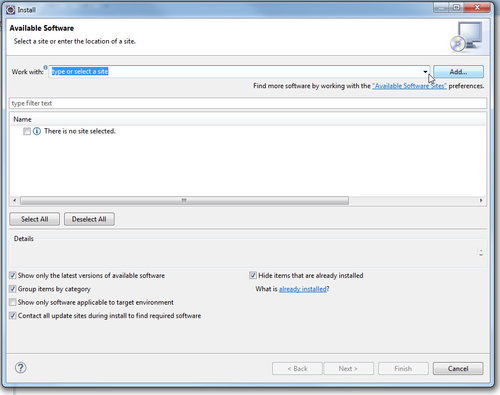
Step 1 - Install New Software
In Eclipse, choose Help/Software Updates/Find and Install.

Step 2 - Add New Remote Site
Select Add... button to add a new remote site.
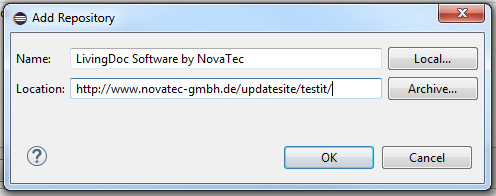
Step 3 - Add Repository
To update the plugin enter following link: http://updatesite.novatec-gmbh.de/updatesite/testit/livingdoc/livingdoc-eclipse4/releases/1.3.2/
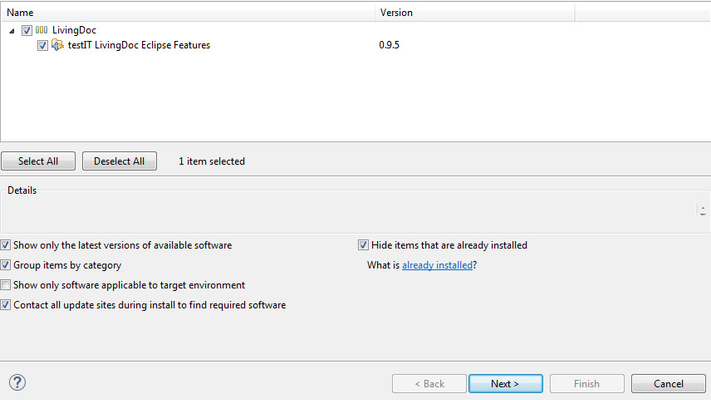
Step 4 - Select Package
In the tree of available updates select testIT LivingDoc Eclipse Features and click Next >.
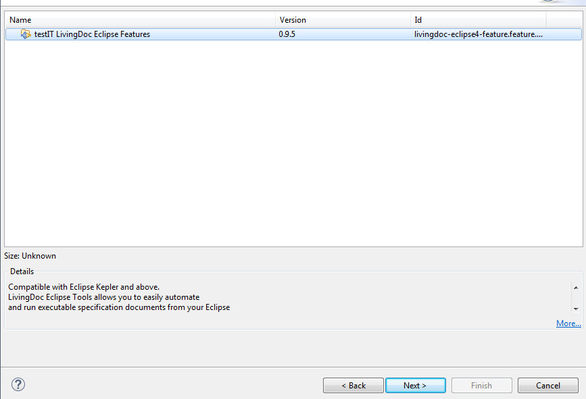
Step 5 - Installation Wizard
Click Next > button in the Install Details window.
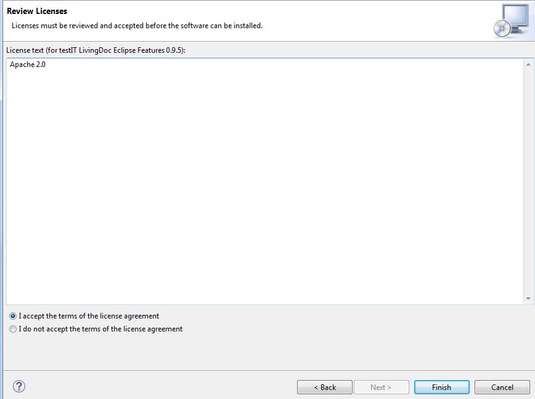
Step 6 - Accept License Agreement
You have to accept the terms of the license agreement to be able to proceed with the installation. You are now ready for the installation, click Finish.
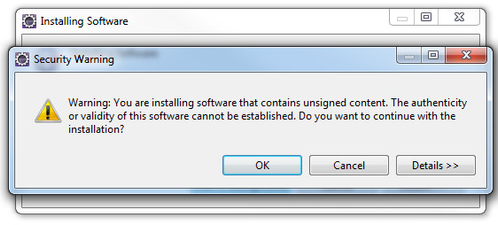
Step 7 - Installation Progress
Once the download manager has started downloading, you see the Security Warning popup. The authenticity of software can not be established. You have to click OK to continue with the installation.

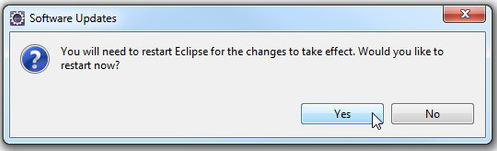
Step 8 - Restart Eclipse
After the installation you must restart the Eclipse workbench, for the plugin to be available within the application.
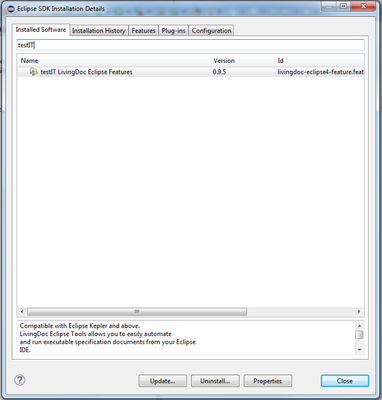
Step 9 - Checking the installation
You should now see the LivingDoc menu on the toolbar.

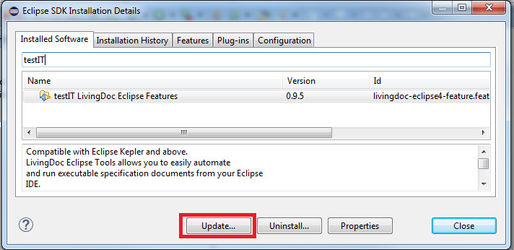
Select Installation Details menu from Help to check the correct installation of the plugin (Filter for "testIT" to find it faster).
Step 10 - Updating
You can see the current installed version of the plugin and a link for checking for updates.
Alternative: Select the first option in step 2.
Configure
Following steps are needed to configure the LivingDoc Eclipse plugin.
Before you begin, you must verify:
- You have downloaded the binaries for the dependencies on your workstation.
- Confluence is well configured.
Workspace configuration
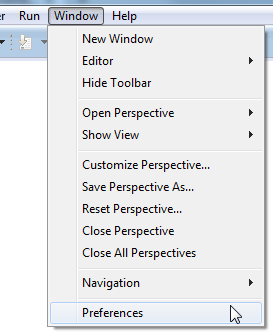
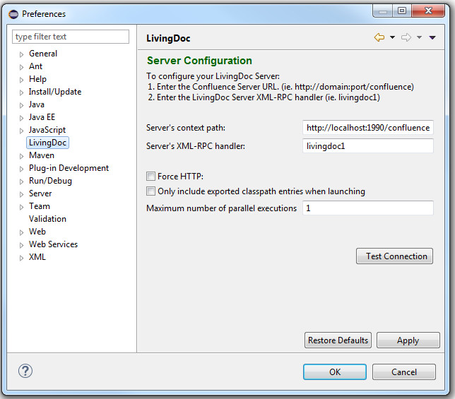
First, you have to configure where the plugin can find the LivingDoc Server. This is done in Window >> Preferences.
Enter the URL for the server :
- For Confluence, it is the base URL of Confluence (e.g. http: //domain:8080/confluence)
Enter the XML-RPC handler. (For now only livingdoc1 is available.) You can test the connection by clicking on the Test Connection button.
Project configuration
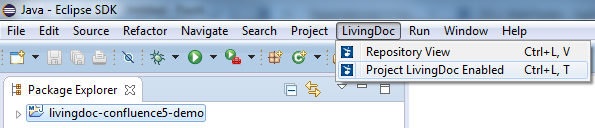
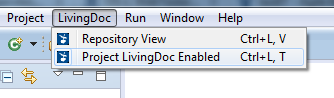
Enable LivingDoc on a project by selecting LivingDoc/Project LivingDoc enabled.
You should see a check mark beside the menu option afterwards.
Only Java projects can be LivingDoc enabled.
Once your project has been LivingDoc enabled, check its properties (right-click Project/Properties).
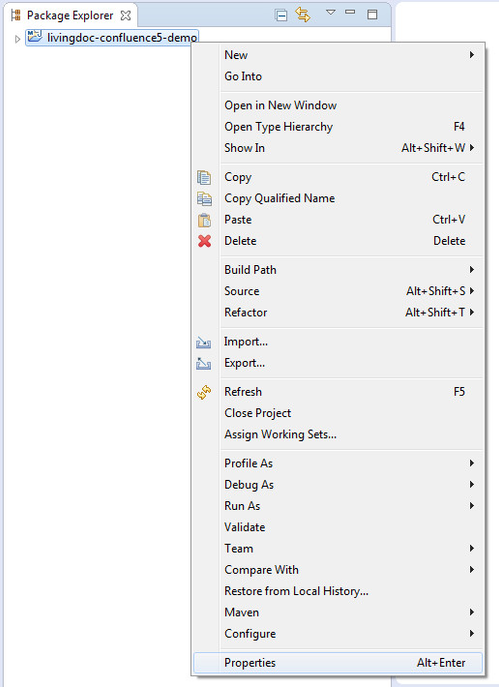
You should now have a LivingDoc property page with two sub-pages.
- Advanced settings
- Local repositories
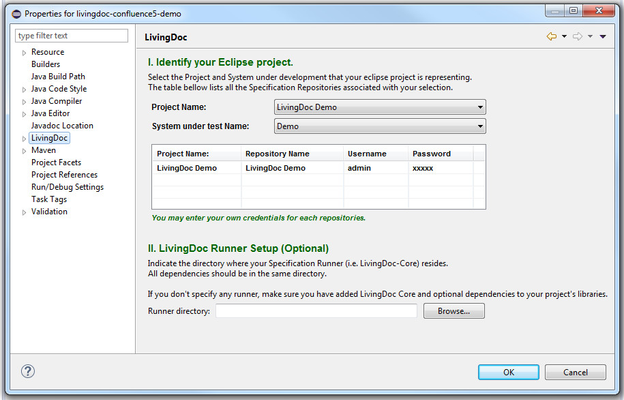
In the LivingDoc page, you will identify your Eclipse project to a System Under Test (under development).
By doing so, you will see all the associated specification repositories. You will be able to enter your own credentials
for each of these repositories. Optional
You will also need to configure your runner location. Mandatory
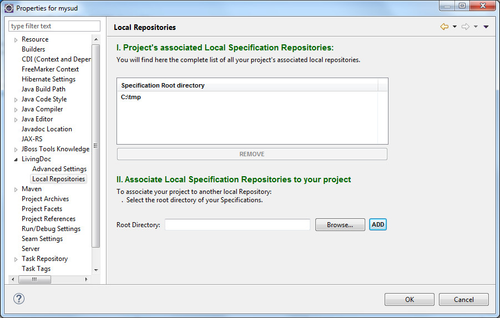
The local repository page associates your project to local specification directories accessible with your computer.
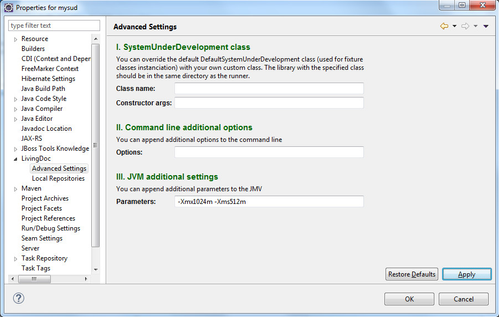
The advanced settings let you override the SystemUnderDevelopment class that resolves the fixture and domain classes.
Make sure your class is in a library that resides in your runner directory. The arguments are separated by ";" and will be passed to
the constructor. Please see the command line options.
You will be able to add additional options to the command line and append additional JVM parameters (e.g. higher JVM space as demonstrated below).
You are now ready to execute specification documents on your development code.
Use
Running specifications
A LivingDoc project, inside Eclipse, is a Java Project.
When you enabled LivingDoc in a Java project, you gain access to run fixtures inside your Eclipse IDE.
Prepare Confluence Page
Before using LivingDoc in Eclipse you have to specify your executable table and implement a suitable fixture. The guide about how to write your executable specification can found here.
Please make sure that your modified Confluence page is up-to-date. Click on Set as Implemented as shown below.

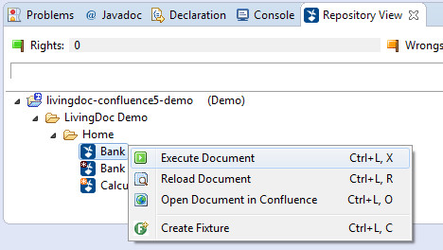
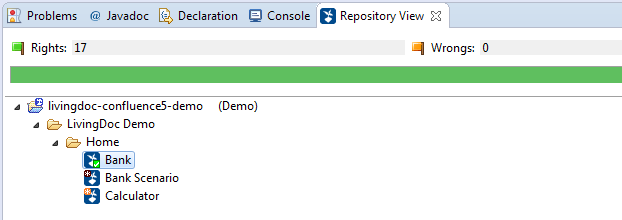
Now your executable table can found inside your Eclipse IDE. For creating a new Fixture open the LivingDoc repository view by clicking "LivingDoc" > "Repository View".
Now you should see your Java-Project and the projekt-name in parentheses which you set in your Confluence configuration. If you expand all you should see something like this:

With a right click on one your Confluence page (here e.g. "TestPage") you can generate your first fixture class. Click "Create Fixture", choose the Fixture Name you want to create and set the package for your fixture.
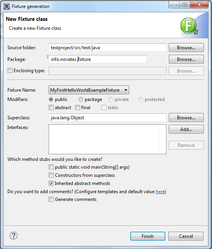
After clicking "Finish" the Fixture template is generated. Now you have to implement your functionality.
package info.novatec.fixture;

import info.novatec.testit.livingdoc.reflect.annotation.FixtureClass;

@FixtureClass({ "concatenate some words", "another alias" })
public class MyFirstHelloWorldExampleFixture {

	public String firstWord;
    public String secondWord;

	public String concatenateTwoWords() {
        return firstWord + " " + secondWord;
    }
}
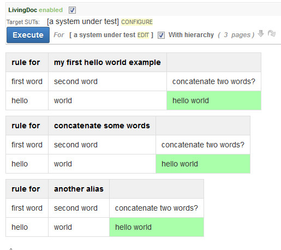
You may have noticed the Annotation FixtureClass. This Annotation provides the opportunity to create executable specifications without importing packages of fixtures. Currently it works only in this direction. If you want to execute your specification inside your Confluence Space you have to import the packages where the fixture can found.
Furthermore you can specify aliases inside braces next to the FixtureClass-Annotation to improve readable specification-header. LivingDoc matches your table-names and these aliases. The screenshot below shows you three almost equal specifications. Have a look to the second cell in the first, grey rows. All these specifications uses the class MyFirstHelloWorldExampleFixture.
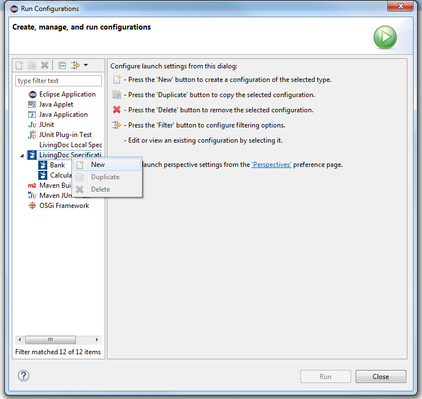
Run Configuration
To validate that your project development code respect the example in the specifications, you create a new Run Configuration. The Debug configuration works the same way. Then create a new LivingDoc Specification
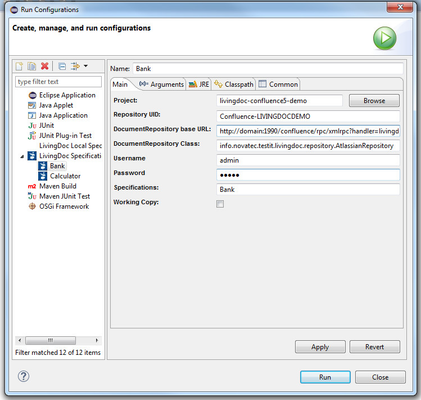
Inputs
- Project
Your eclipse project to launch the specification on. - Repository UID
The remote Repository UID (None if local) - Document Repository base URL
The Repository URL (Or directory path if local) - Document Repository Class
- info.novatec.testit.livingdoc.repository.FileSystemRepository for files
- info.novatec.testit.livingdoc.runner.repository.AtlassianRepository for Confluence
- info.novatec.testit.livingdoc.runner.repository.VFSRepository for zip ...
- Username
If Authentication is need for the Repository access - Password
If Authentication is need for the Repository access - Specification
The Specification name (Document name) - Current Version
If versioning is handled, aim for the latest version of the document.
Execute Document
Open the Repository View and click right to execute a certain document to run the tests.
Results
Running the specification will give you a result like this one

Notice that the html result file was added to your project files.
Text Result
If the window displayed shows html in a text format, check your Open With setting for the html file
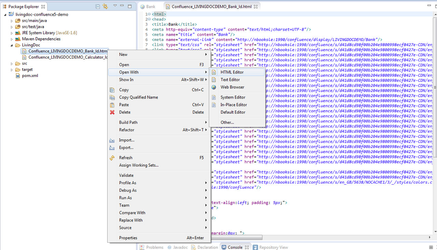
You need the Browser support plugin to be able to see the HTML page inside an Eclipse Editor.
Repository view
You can view all the specifications for your project using the repository view.
Show the repository view window
There is two ways to access the repository view.
1) From the LivingDoc menu
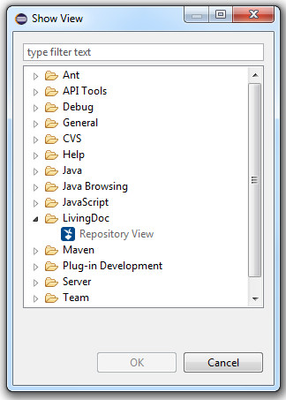
2) From the eclipse standard view selection.
First choose Show View-Other
Then choose LivingDoc Repository View
The Repository View
The Repository view is a JUnit like view.
You will be able to launch executions, view documents and results and work on both Implemented and Working copies of the documents.
Careful ! the Green bar might be addictive after a while ...
|
|


By default Eclipse will work on the Implemented copy of the document.
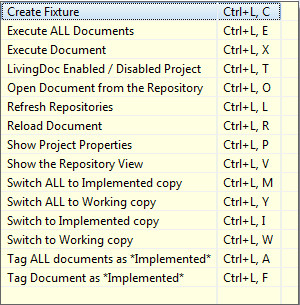
Keyboard shortcuts
FAQ
I cannot see the LivingDoc property page for my project.
- Make sure your project has been LivingDoc enabled using the option menu. Only projects with a LivingDoc nature have the LivingDoc property pages.
See Configure LivingDoc Eclipse plugin for more information.
- Currently the using of LivingDoc property page is not possible when using project explroer view. Please switch to package explorer view.
I cannot see my project in the projects combo when creating a Run Configuration.
Make sure your project has been LivingDoc enabled using the option menu. Only projects with a LivingDoc nature can have a LivingDoc run configuration. See Configure LivingDoc Eclipse plugin for more information.
Some of the pages I retrieved from Confluence have underlined macro errors.
To prevent deadlocks, we ask Confluence not to render the LivingDoc macros for third party applications witch result in an underlined error on the rendered page.
No "System under Test Name" available when opening LivingDoc property page
Make sure that version numbers of imported LivingDoc-Eclipse-Plugin and used LivingDoc-Version (dependencies in pom.xml) matches.