...
- Select the Space which you want to register, then click Register.
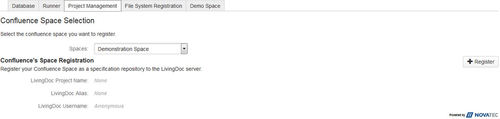
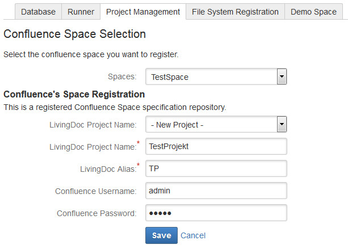
- Select the
 project to which you want to associate your repository to or choose New Project.
 - Enter the Project name if you want to register a new project
- Enter the alias to identify your Confluence Space (i.e. PROJECTNAME).
- In order to restrict access, enter the username and password of a Confluence user. This restriction will be applied to Confluence and any other plugins accessing or executing the executable specifications.
- Click Save.
- From the list, select a system under test, if any available.
- If no one is available choose Add a new System under Test
- Enter the name of your System under Test. It don't has to be the project name of your SuT.
- Select the Runner you have specified in step 2.1.2
Enter the Classpath, where your LivingDoc-Classes(Fixtures) can be found
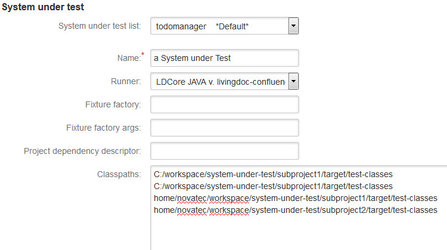
Note You can set different classpaths to the same project(e.g. different folder locations for Linux- and Windows-Users). Delimitate paths with a NewLine(Enter). While executing tables every non existing path will be ignored.
Please ensure the data consistency of two or more classes of the same name and package but a different and existing path. The easiest way to achieve this, is to keep your project up-to-date via version control systems like Git or Subversion.
How to migrate a repository
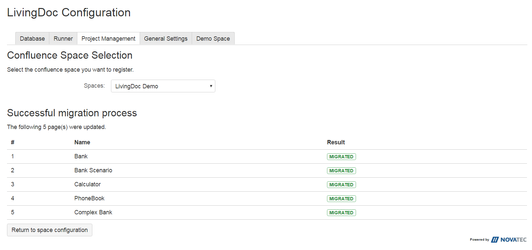
If you have upgraded LivingDoc maybe is necessary to migrate the space in order to add the LivingDoc Header to all specifications. After register a repository a Migrate space button appears in the right side of the window.
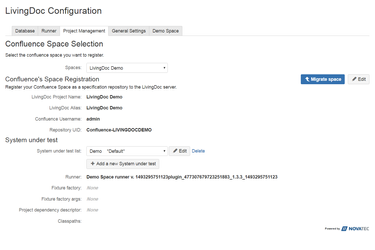
After click on it you can see all pages that will be updated.
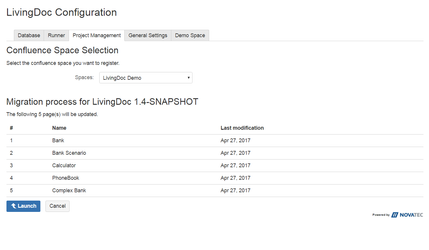
Then you can press on Launch. Done, your space has been migrated.
Confluence Space setup
Using LivingDoc theme (Deprecated since v1.4.x: LivingDoc Theme will be removed, please use LivingDoc Page Macro)
...